
DIY Headlight Restoration: Tips from the Pros


Understanding Headlight Deterioration
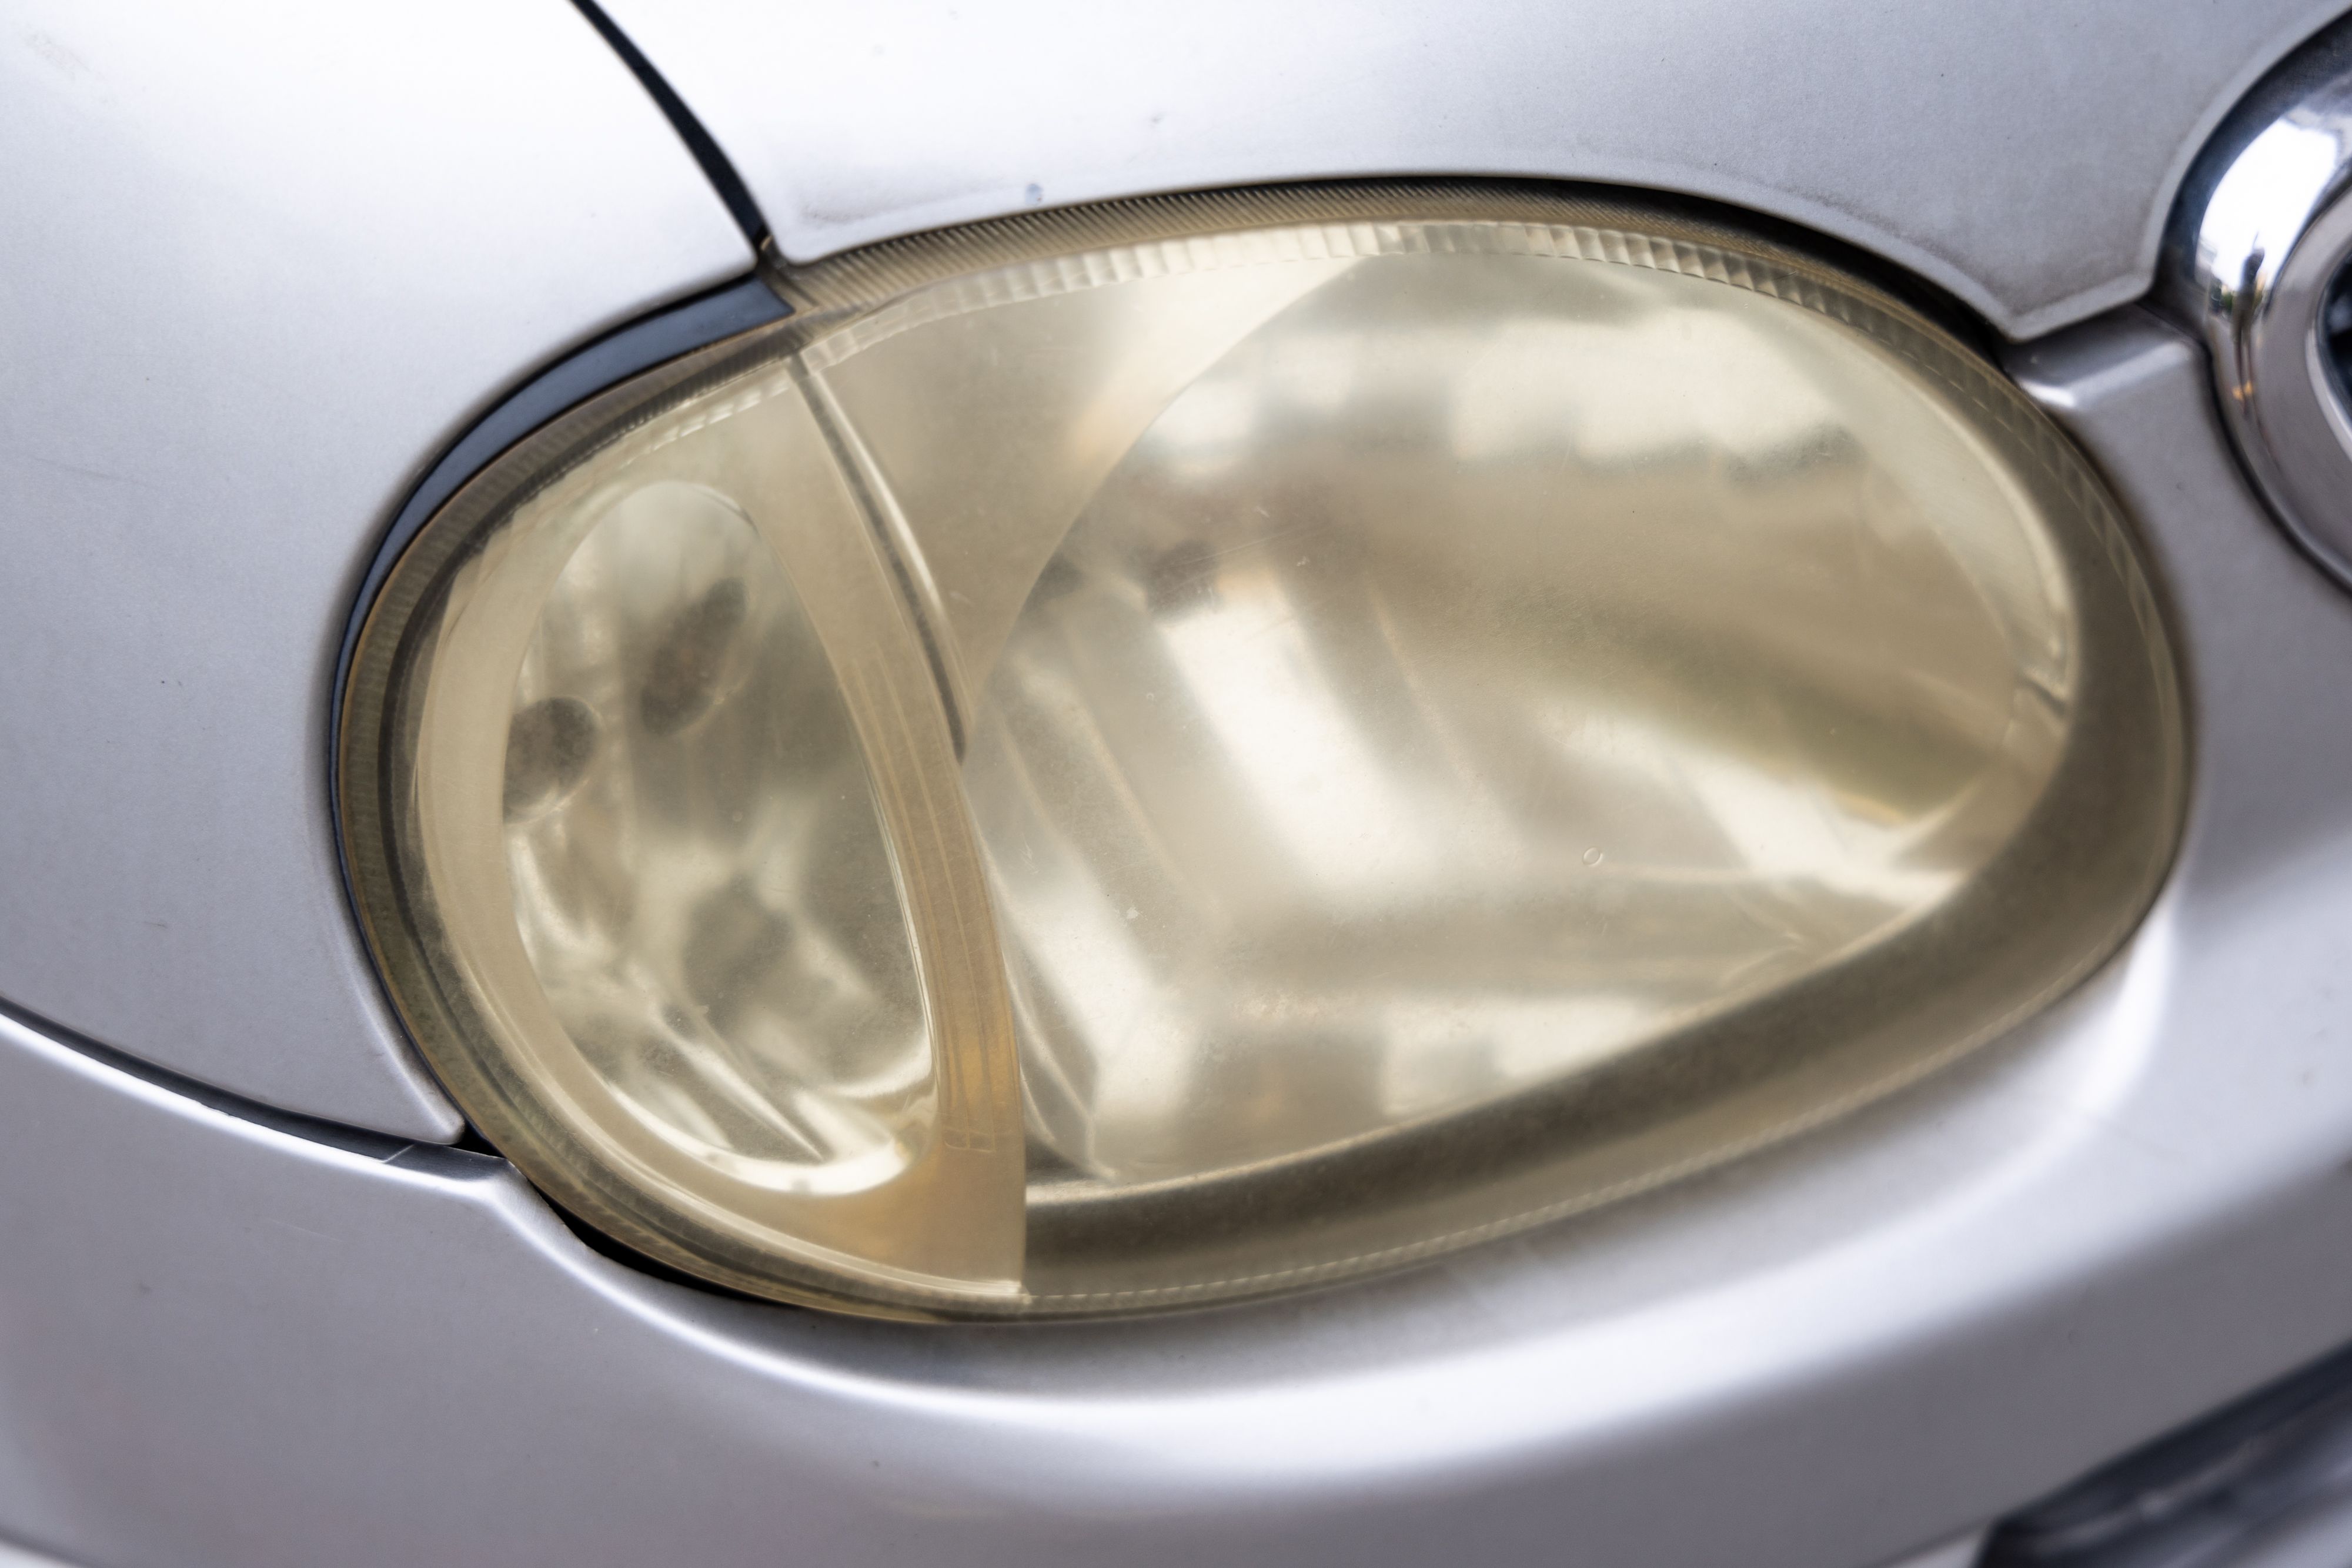
Over time, the polycarbonate lenses of headlights can become cloudy or yellowed due to exposure to UV rays, road debris, and environmental contaminants. This deterioration not only affects the appearance of your vehicle but also reduces the effectiveness of your headlights, making nighttime driving more dangerous. Regular maintenance can help restore clarity and enhance performance.
Gathering Your Materials
Before you begin the DIY headlight restoration process, it's essential to gather all necessary materials. You'll need:
- Automotive masking tape
- Cleaning solution or glass cleaner
- Sandpaper (various grits: 400, 800, 1000, 2000)
- Polishing compound
- A clean microfiber cloth
- UV sealant
Having these items on hand will ensure a smooth restoration process and help you achieve professional results.
Preparing Your Work Area
Before starting the restoration, make sure your work area is well-lit and ventilated. It's also best to work on a cool, dry day to avoid any complications caused by humidity or excessive heat. Use automotive masking tape to cover the areas around your headlights to protect your car's paint from accidental scratches during the restoration process.
The Restoration Process
Cleaning the Headlights
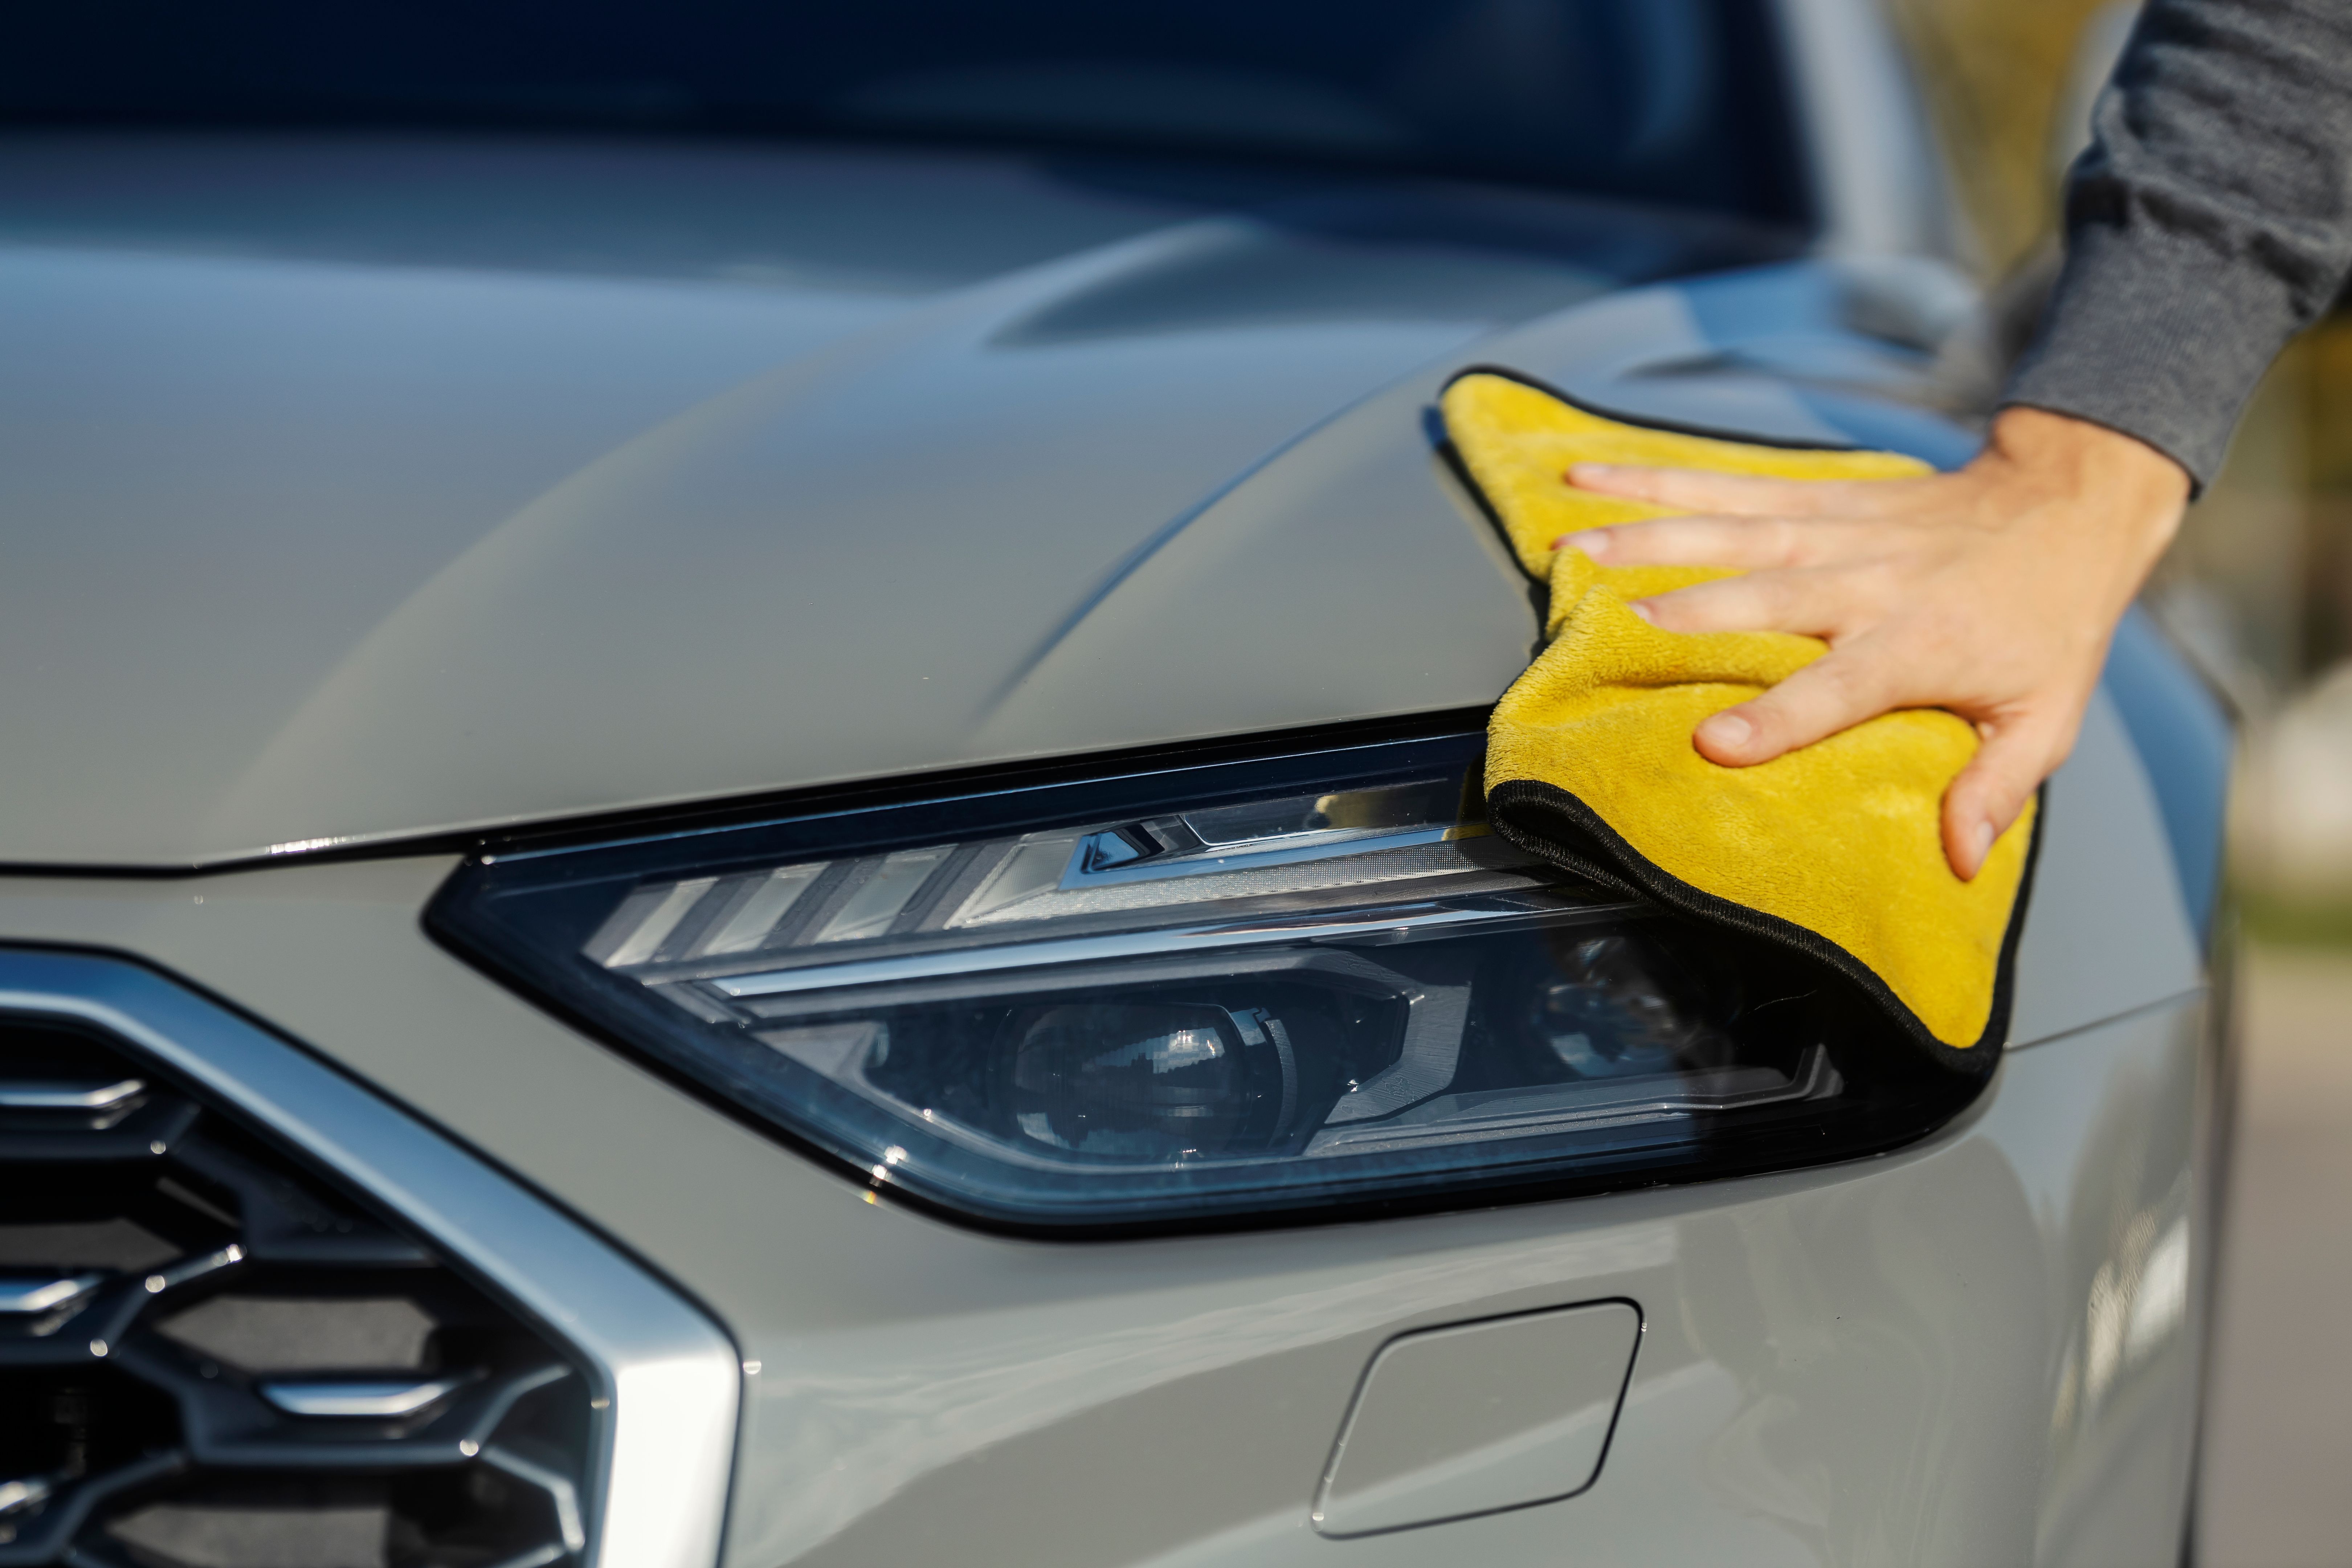
Begin by cleaning the headlights thoroughly with a glass cleaner or a dedicated automotive cleaning solution. This step removes any surface dirt and grime, allowing the sandpaper to work more effectively. Be sure to dry the headlights completely with a microfiber cloth before proceeding to the next step.
Sanding for Clarity
This step is crucial for removing the oxidation layer from the headlight surface. Start with a coarse-grit sandpaper (400 grit) and gently sand the headlight in a horizontal motion. Gradually switch to finer grits (800, 1000, and finally 2000) to smooth out the surface. Keep the surface wet during sanding to prevent scratches and make the process easier.
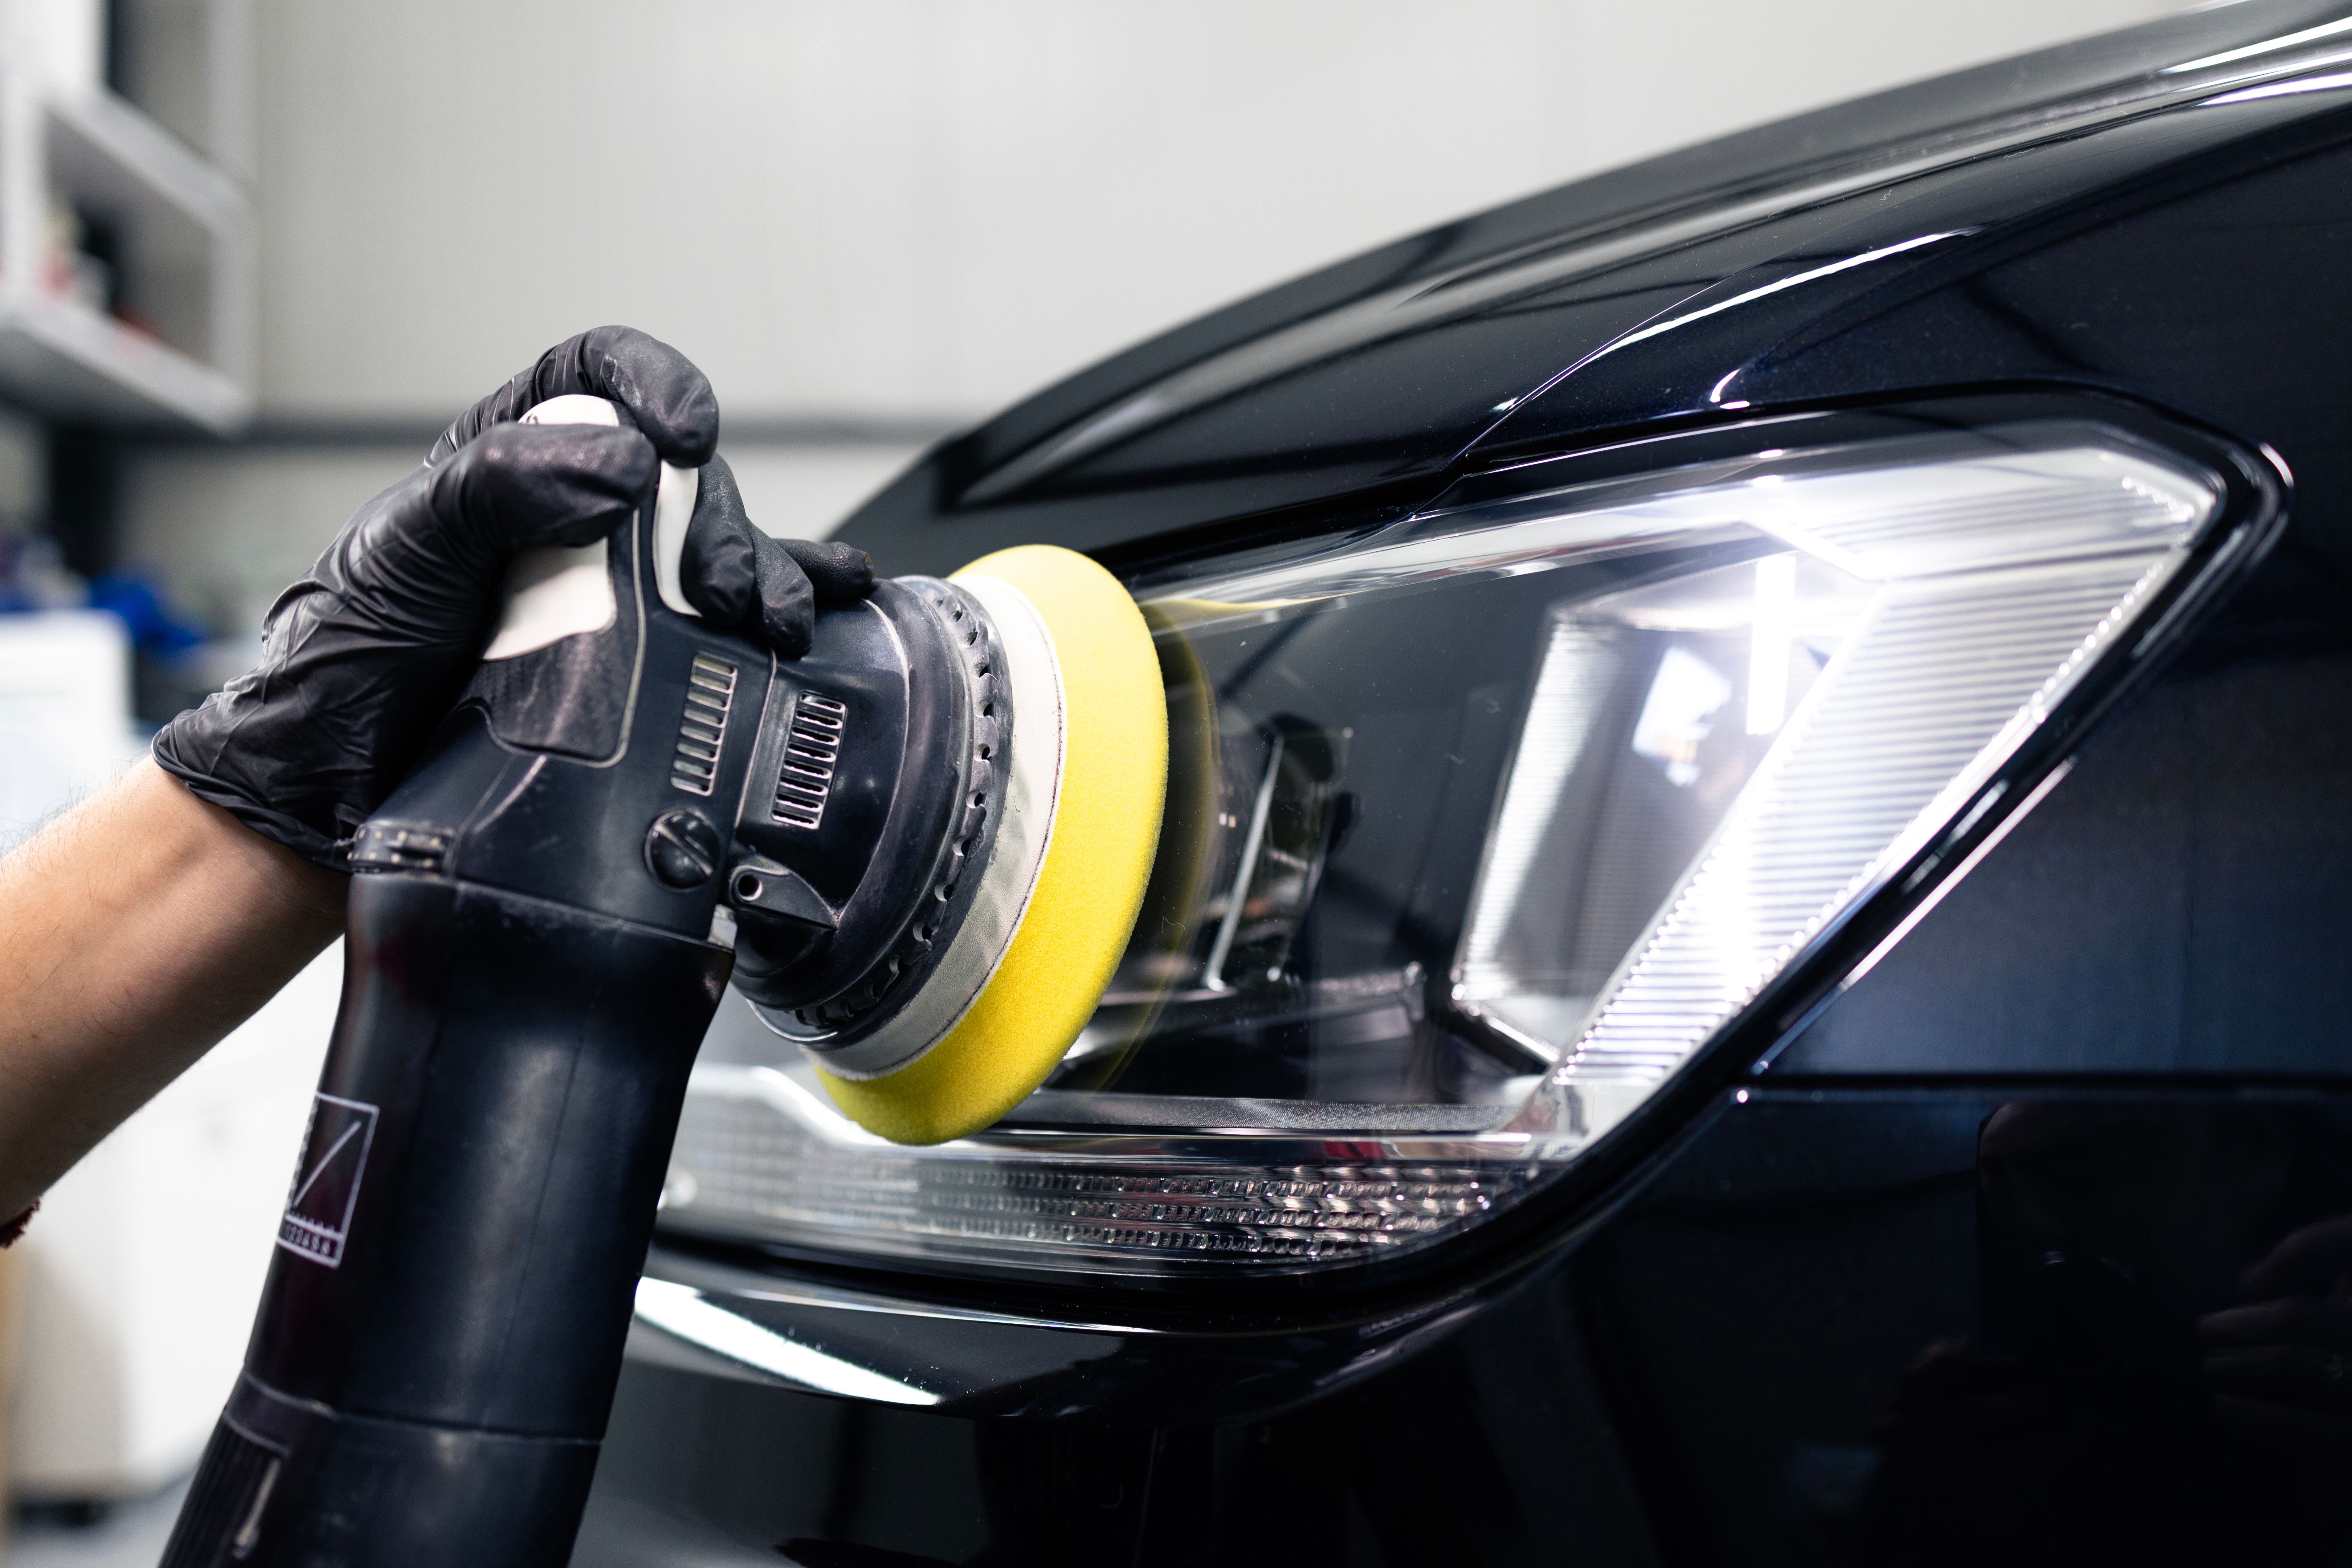
Polishing for a Clear Finish
Once sanding is complete, apply a polishing compound to a clean microfiber cloth and rub it onto the headlight in circular motions. This step helps to restore clarity and shine by removing any fine scratches left by the sandpaper. Continue polishing until you achieve a clear finish.
Applying UV Sealant
The final step in the DIY headlight restoration process is applying a UV sealant. This product protects the freshly restored headlights from future UV damage and oxidation. Follow the manufacturer's instructions for application, and allow the sealant to dry completely before using your vehicle.
Maintaining Restored Headlights
To keep your headlights looking clear and bright, regular maintenance is essential. Consider applying a fresh coat of UV sealant every few months and routinely cleaning the lenses with an automotive glass cleaner. By taking these simple steps, you can prolong the life of your restored headlights and ensure safe driving conditions.
With these expert tips, you can achieve professional-level results in restoring your vehicle's headlights, improving both their appearance and functionality.